Running GPU-accelerated workloads inside containers should be straightforward, but the gap between a bare-metal NVIDIA driver and a working GPU inside a Docker container has tripped up enough system administrators to fill a small support forum. The NVIDIA Container Toolkit bridges that gap. It hooks into the container runtime, intercepts GPU-related requests, and injects the right driver libraries and device nodes into the container at launch. Once configured, you can run nvidia-smi inside a container and get exactly the same output as on the host — full GPU visibility, no manual bind mounts, no fragile LD_LIBRARY_PATH hacks.
Brousseau and Sharp emphasize in LLMs in Production that GPU resource management in Docker environments requires careful attention to isolation. Without explicit GPU limits, a single container can monopolize all available GPUs, starving other workloads. They recommend using --gpus flags to assign specific GPUs to specific containers, and monitoring GPU utilization per container using nvidia-smi or DCGM (Data Center GPU Manager). For multi-model deployments where Ollama, embedding models, and other AI services share the same GPU, NVIDIA MPS (Multi-Process Service) can improve utilization by allowing concurrent GPU kernel execution.
Container-based GPU deployment has become the standard for production AI infrastructure. Ranjan et al. explain in Agentic AI in Enterprise that Kubernetes with GPU scheduling is the dominant pattern for enterprise AI deployments, and the NVIDIA Container Toolkit is the foundational layer that makes this possible. It exposes the host's GPU drivers and libraries inside containers through the NVIDIA Container Runtime, eliminating the need to install CUDA toolkits inside each container image. This separation of concerns (host manages drivers, containers manage applications) follows the same principle that made Docker successful for CPU workloads.
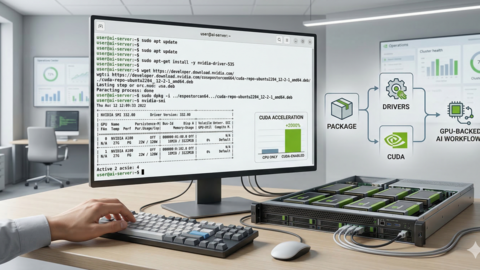
This guide covers the nvidia container toolkit install linux process from scratch, across the distributions that matter for production AI work: Ubuntu, Debian, Fedora, and RHEL. We will go beyond the basic install, covering docker-compose GPU configuration, Podman support, the newer Container Device Interface (CDI) approach, and the troubleshooting steps for every common failure mode. If you have spent time debugging "Failed to initialize NVML" errors inside containers, this is the guide that fixes that once and for all.
What the NVIDIA Container Toolkit Actually Does
Before diving into installation, it helps to understand what happens under the hood. The NVIDIA Container Toolkit is not a single binary — it is a collection of components that work together to expose GPUs to containerized processes.
Architecture Overview
The toolkit consists of several layered components. At the top level, nvidia-ctk is the CLI utility for configuration and management. Below that, nvidia-container-runtime wraps the OCI runtime (usually runc) and modifies the container specification before the container starts. The nvidia-container-runtime-hook is a prestart hook that runs before the container entrypoint and handles the actual device injection. At the bottom, libnvidia-container is the C library that interacts with the NVIDIA driver to enumerate GPUs, manage device access, and bind-mount the correct driver libraries into the container filesystem.
When you run docker run --gpus all nvidia/cuda:12.6.0-base-ubuntu24.04 nvidia-smi, here is what actually happens: Docker calls the NVIDIA container runtime instead of the default runc. The runtime invokes the prestart hook. The hook calls into libnvidia-container, which queries the host NVIDIA driver for available GPUs. It then modifies the container's OCI specification to add device nodes (like /dev/nvidia0), bind-mount driver libraries into the container, and set the appropriate environment variables. The container process then starts with full GPU access, as if the driver were installed inside the container itself.
This architecture means the container image does not need the NVIDIA driver installed. It only needs the CUDA userspace libraries (or whatever GPU libraries the application requires). The driver comes from the host, injected at runtime. That is why you will see Docker images labeled with CUDA versions but not driver versions — the driver compatibility is handled at the host level.
Prerequisites: Host NVIDIA Driver Installation
The container toolkit depends on a working NVIDIA driver on the host. The container inherits the host's driver, so the host driver version determines which CUDA versions your containers can use. NVIDIA drivers are backward-compatible with CUDA: driver version 560 supports CUDA 12.6 and every earlier CUDA version.
Ubuntu / Debian Driver Installation
# Check if you already have an NVIDIA driver installed
nvidia-smi

# If not installed, add the NVIDIA driver PPA (Ubuntu)
sudo add-apt-repository ppa:graphics-drivers/ppa -y
sudo apt update

# List available driver versions
apt list nvidia-driver-* 2>/dev/null | grep -E "nvidia-driver-[0-9]+" | sort -t- -k3 -n

# Install the latest production driver (560 series as of early 2026)
sudo apt install -y nvidia-driver-560

# For Debian, use the non-free repository instead
# Add to /etc/apt/sources.list:
# deb http://deb.debian.org/debian bookworm non-free non-free-firmware
# Then:
# sudo apt update && sudo apt install -y nvidia-driver

# Reboot to load the new kernel module
sudo reboot
Fedora / RHEL Driver Installation
# Fedora: Enable RPM Fusion repository
sudo dnf install -y \
  https://download1.rpmfusion.org/free/fedora/rpmfusion-free-release-$(rpm -E %fedora).noarch.rpm \
  https://download1.rpmfusion.org/nonfree/fedora/rpmfusion-nonfree-release-$(rpm -E %fedora).noarch.rpm

sudo dnf install -y akmod-nvidia xorg-x11-drv-nvidia-cuda

# RHEL 9: Use NVIDIA's official repository
sudo dnf install -y https://dl.fedoraproject.org/pub/epel/epel-release-latest-9.noarch.rpm
sudo dnf config-manager --add-repo https://developer.download.nvidia.com/compute/cuda/repos/rhel9/x86_64/cuda-rhel9.repo
sudo dnf module install -y nvidia-driver:560-dkms

# Reboot after installation
sudo reboot

# Verify driver is loaded
nvidia-smi
After rebooting, nvidia-smi should display your GPU model, driver version, and CUDA version. If it does not, stop here and fix the host driver before proceeding — the container toolkit cannot work without it.
Installing the NVIDIA Container Toolkit
NVIDIA distributes the container toolkit through their own package repositories. The installation process differs slightly between distribution families, but the result is the same set of components on all of them.
Ubuntu and Debian
# Configure the NVIDIA container toolkit repository
curl -fsSL https://nvidia.github.io/libnvidia-container/gpgkey | \
  sudo gpg --dearmor -o /usr/share/keyrings/nvidia-container-toolkit-keyring.gpg

curl -s -L https://nvidia.github.io/libnvidia-container/stable/deb/nvidia-container-toolkit.list | \
  sed 's#deb https://#deb [signed-by=/usr/share/keyrings/nvidia-container-toolkit-keyring.gpg] https://#g' | \
  sudo tee /etc/apt/sources.list.d/nvidia-container-toolkit.list

sudo apt update

# Install the toolkit
sudo apt install -y nvidia-container-toolkit

# Verify installation
nvidia-ctk --version
Fedora
# Add the NVIDIA container toolkit repository
curl -s -L https://nvidia.github.io/libnvidia-container/stable/rpm/nvidia-container-toolkit.repo | \
  sudo tee /etc/yum.repos.d/nvidia-container-toolkit.repo

# Install the toolkit
sudo dnf install -y nvidia-container-toolkit

# Verify installation
nvidia-ctk --version
RHEL 9 / Rocky Linux 9 / AlmaLinux 9
# Add the repository
curl -s -L https://nvidia.github.io/libnvidia-container/stable/rpm/nvidia-container-toolkit.repo | \
  sudo tee /etc/yum.repos.d/nvidia-container-toolkit.repo

# Install
sudo dnf install -y nvidia-container-toolkit

# On RHEL with subscription, you may need to enable CodeReady Builder:
sudo subscription-manager repos --enable codeready-builder-for-rhel-9-x86_64-rpms

nvidia-ctk --version
Configuring Docker to Use GPUs
Installing the toolkit packages is only half the job. You also need to configure Docker's daemon to use the NVIDIA runtime. There are two approaches: the legacy --runtime approach and the newer CDI approach. Both work, but CDI is the direction NVIDIA is heading and offers more flexibility.
Method 1: Configure the NVIDIA Runtime (Classic Approach)
# Automatically configure Docker to use the NVIDIA runtime
sudo nvidia-ctk runtime configure --runtime=docker

# This modifies /etc/docker/daemon.json to add the nvidia runtime
# Verify the configuration
cat /etc/docker/daemon.json
The generated daemon.json will look something like this:
{
    "runtimes": {
        "nvidia": {
            "args": [],
            "path": "nvidia-container-runtime"
        }
    }
}
# Restart Docker to apply the configuration
sudo systemctl restart docker
# Test GPU access inside a container
docker run --rm --gpus all nvidia/cuda:12.6.0-base-ubuntu24.04 nvidia-smiIf everything is configured correctly, you will see the familiar nvidia-smi output showing your GPU, driver version, and CUDA version — but this time running inside a container. The --gpus all flag tells Docker to pass all available GPUs to the container.
Selecting Specific GPUs
# Pass only the first GPU
docker run --rm --gpus '"device=0"' nvidia/cuda:12.6.0-base-ubuntu24.04 nvidia-smi

# Pass GPUs 0 and 2 (skipping 1)
docker run --rm --gpus '"device=0,2"' nvidia/cuda:12.6.0-base-ubuntu24.04 nvidia-smi

# Pass GPUs by UUID (useful when GPU ordering changes after reboot)
docker run --rm --gpus '"device=GPU-d1234567-89ab-cdef-0123-456789abcdef"' \
  nvidia/cuda:12.6.0-base-ubuntu24.04 nvidia-smi
Setting the NVIDIA Runtime as Default
If every container on this host needs GPU access, you can set NVIDIA as the default runtime so you do not have to pass --gpus to every run command:
# Set NVIDIA as the default runtime
sudo nvidia-ctk runtime configure --runtime=docker --set-as-default

# Restart Docker
sudo systemctl restart docker

# Now GPU access is automatic — no --gpus flag needed
docker run --rm nvidia/cuda:12.6.0-base-ubuntu24.04 nvidia-smi
Method 2: Container Device Interface (CDI)
CDI is a newer, vendor-neutral specification for exposing devices to containers. Instead of the NVIDIA-specific runtime hook, CDI uses a standardized device specification file that any CDI-compatible runtime can read. This is the approach NVIDIA recommends for new installations, and it is required for some newer container runtimes.
# Generate the CDI specification for your GPUs
sudo nvidia-ctk cdi generate --output=/etc/cdi/nvidia.yaml

# Verify the generated spec
nvidia-ctk cdi list

# Expected output:
# INFO[0000] Found 1 CDI devices
# nvidia.com/gpu=0

# Use CDI with Docker (requires Docker 25+)
docker run --rm --device nvidia.com/gpu=all \
  nvidia/cuda:12.6.0-base-ubuntu24.04 nvidia-smi

# Select specific GPUs with CDI
docker run --rm --device nvidia.com/gpu=0 \
  nvidia/cuda:12.6.0-base-ubuntu24.04 nvidia-smi
The CDI approach has a significant advantage: the CDI specification file is generated once and describes the GPU topology of the machine. If you add or remove GPUs, you regenerate the file. This is cleaner than the runtime hook approach, which queries the driver at every container start. CDI also works across different container runtimes without runtime-specific configuration — the same spec file works with Docker, Podman, containerd, and CRI-O.
Docker Compose GPU Configuration
Production AI workloads rarely use raw docker run commands. Docker Compose is the standard for defining multi-container applications, and GPU configuration in Compose files has gotten much cleaner since Compose v2.
Basic GPU Access in docker-compose.yml
services:
  ollama:
    image: ollama/ollama:latest
    ports:
      - "11434:11434"
    volumes:
      - ollama_data:/root/.ollama
    deploy:
      resources:
        reservations:
          devices:
            - driver: nvidia
              count: all
              capabilities: [gpu]
    restart: unless-stopped

volumes:
  ollama_data:
Selecting Specific GPUs and Setting Capabilities
services:
  inference-server:
    image: vllm/vllm-openai:latest
    deploy:
      resources:
        reservations:
          devices:
            - driver: nvidia
              device_ids: ["0", "1"]
              capabilities: [gpu, compute, utility]
    environment:
      - NVIDIA_VISIBLE_DEVICES=0,1
      - CUDA_VISIBLE_DEVICES=0,1

  training-worker:
    image: pytorch/pytorch:2.5.0-cuda12.6-cudnn9-runtime
    deploy:
      resources:
        reservations:
          devices:
            - driver: nvidia
              device_ids: ["2", "3"]
              capabilities: [gpu, compute, utility]
    environment:
      - NVIDIA_VISIBLE_DEVICES=2,3
Compose with CDI Devices
# Docker Compose v2.24+ supports CDI devices directly
services:
  ai-worker:
    image: ollama/ollama:latest
    devices:
      - nvidia.com/gpu=all
    volumes:
      - ollama_data:/root/.ollama

volumes:
  ollama_data:
Podman GPU Support
Podman has become the default container engine on RHEL 9 and Fedora, and its GPU support through CDI is actually cleaner than Docker's. Since Podman 4.1+, CDI is the native and recommended way to access GPUs.
# Generate CDI spec (same as Docker)
sudo nvidia-ctk cdi generate --output=/etc/cdi/nvidia.yaml

# Run a GPU container with Podman
podman run --rm --device nvidia.com/gpu=all \
  nvidia/cuda:12.6.0-base-ubuntu24.04 nvidia-smi

# Rootless Podman with GPU access
# First, generate CDI spec for the user
nvidia-ctk cdi generate --output=$HOME/.config/cdi/nvidia.yaml

# Then run rootless
podman run --rm --device nvidia.com/gpu=all \
  nvidia/cuda:12.6.0-base-ubuntu24.04 nvidia-smi
Rootless GPU containers with Podman are a significant security improvement over Docker's approach, which typically requires root access for GPU passthrough. With CDI, the device specification is a static YAML file that can be managed independently of the container runtime, and rootless users can reference devices without elevated privileges (provided the host permissions on /dev/nvidia* are correctly set).
Podman Compose with GPU
# podman-compose supports the same deploy syntax as docker-compose
# Alternatively, use Quadlet (Podman's systemd integration)

# Create a Quadlet container file: ~/.config/containers/systemd/ollama.container
[Container]
Image=ollama/ollama:latest
PublishPort=11434:11434
Volume=ollama_data.volume:/root/.ollama
AddDevice=nvidia.com/gpu=all

[Service]
Restart=always

[Install]
WantedBy=default.target
Environment Variables for Fine-Grained Control
The NVIDIA Container Toolkit respects several environment variables that give you fine-grained control over what GPU resources are exposed to containers. These can be set in Dockerfiles, docker-compose files, or at runtime.
# NVIDIA_VISIBLE_DEVICES: Which GPUs to expose
# Values: all, none, void, or comma-separated GPU indices/UUIDs
docker run --gpus all -e NVIDIA_VISIBLE_DEVICES=0,1 myimage

# NVIDIA_DRIVER_CAPABILITIES: Which driver features to expose
# Values: compute, compat32, graphics, utility, video, display, all
# For AI/ML workloads, you typically need compute and utility
docker run --gpus all -e NVIDIA_DRIVER_CAPABILITIES=compute,utility myimage

# NVIDIA_REQUIRE_CUDA: Enforce minimum CUDA version
docker run --gpus all -e NVIDIA_REQUIRE_CUDA=">=12.0" myimage

# NVIDIA_MPS_ENABLE: Enable Multi-Process Service for shared GPU access
docker run --gpus all -e CUDA_MPS_ACTIVE_THREAD_PERCENTAGE=50 myimage
Practical Example: Running Ollama with GPU in Docker
Let us put all of this together with a real-world example. We will set up Ollama with GPU acceleration inside Docker, pull a model, and verify that inference is actually using the GPU.
# Pull and run Ollama with GPU support
docker run -d \
  --name ollama \
  --gpus all \
  -p 11434:11434 \
  -v ollama_data:/root/.ollama \
  --restart unless-stopped \
  ollama/ollama:latest

# Wait for startup, then pull a model
sleep 5
docker exec ollama ollama pull llama3.1:8b

# Test inference
docker exec ollama ollama run llama3.1:8b "What is the capital of Ireland?" --verbose

# Check GPU utilization while inference is running
docker exec ollama nvidia-smi

# Verify GPU memory is being used (should show memory allocated for the model)
docker exec ollama bash -c "nvidia-smi --query-gpu=memory.used,memory.total --format=csv"
If the model runs but nvidia-smi shows 0 MiB memory usage, the inference is running on CPU despite the GPU being visible. This usually means the container image does not include the correct CUDA libraries for your driver version. Check the CUDA compatibility matrix and use an appropriate base image.
Multi-GPU and CUDA MPS Configuration
When you have multiple GPUs and multiple containers that need GPU access, you have several strategies for sharing resources.
Dedicated GPUs per Container
# Container A gets GPU 0
docker run -d --name inference-1 --gpus '"device=0"' myimage

# Container B gets GPU 1
docker run -d --name inference-2 --gpus '"device=1"' myimage
Shared GPU with CUDA MPS
CUDA Multi-Process Service allows multiple containers to share a single GPU more efficiently than time-slicing. It keeps the GPU contexts active, reducing context-switch overhead.
# Start the MPS daemon on the host
sudo nvidia-cuda-mps-control -d

# Run multiple containers sharing GPU 0
docker run -d --name worker-1 --gpus '"device=0"' \
  -e CUDA_MPS_ACTIVE_THREAD_PERCENTAGE=50 myimage

docker run -d --name worker-2 --gpus '"device=0"' \
  -e CUDA_MPS_ACTIVE_THREAD_PERCENTAGE=50 myimage

# Monitor MPS status
nvidia-cuda-mps-control -l
Troubleshooting Common Issues
GPU containers fail in predictable ways. Here are the most common issues and their fixes, organized by error message.
"Failed to initialize NVML: Unknown Error"
This is the single most common error. It means the container can see the NVIDIA device nodes but cannot communicate with the driver.
# Check if the NVIDIA device nodes exist on the host
ls -la /dev/nvidia*

# Expected output:
# crw-rw-rw- 1 root root 195,   0 Mar 17 10:00 /dev/nvidia0
# crw-rw-rw- 1 root root 195, 255 Mar 17 10:00 /dev/nvidiactl
# crw-rw-rw- 1 root root 195, 254 Mar 17 10:00 /dev/nvidia-modeset
# crw-rw-rw- 1 root root 511,   0 Mar 17 10:00 /dev/nvidia-uvm

# If /dev/nvidia-uvm is missing, load the module
sudo modprobe nvidia-uvm

# Fix permissions (common on custom kernels)
sudo chmod 666 /dev/nvidia*

# If running with SELinux (RHEL/Fedora), check for denials
sudo ausearch -m AVC -ts recent | grep nvidia
# Fix with:
sudo setsebool -P container_use_devices on
"docker: Error response from daemon: could not select device driver"
# This means the NVIDIA runtime is not configured in Docker
# Re-run the configuration command
sudo nvidia-ctk runtime configure --runtime=docker
sudo systemctl restart docker

# Verify /etc/docker/daemon.json contains the nvidia runtime
cat /etc/docker/daemon.json
Driver Version Mismatch
# Check host driver version
nvidia-smi --query-gpu=driver_version --format=csv,noheader

# The container's CUDA version must be compatible with the host driver
# CUDA 12.6 requires driver 560+
# CUDA 12.4 requires driver 550+
# CUDA 12.2 requires driver 535+
# CUDA 11.8 requires driver 520+

# If your driver is too old, either upgrade the driver or use an older CUDA base image
docker run --rm --gpus all nvidia/cuda:11.8.0-base-ubuntu22.04 nvidia-smi
"Permission Denied" When Accessing GPU
# Check group membership
groups $USER
# Must include: video, render

# Add missing groups
sudo usermod -aG video,render $USER
# Log out and back in

# For Docker, the daemon runs as root, so user groups usually do not matter
# But for rootless Docker or Podman:
# Verify device permissions
ls -la /dev/nvidia* /dev/dri/render*

# Create udev rules for persistent permissions
sudo tee /etc/udev/rules.d/99-nvidia.rules << EOF
KERNEL=="nvidia*", MODE="0666"
KERNEL=="renderD*", MODE="0666"
EOF
sudo udevadm control --reload-rules && sudo udevadm trigger
GPU Not Visible After Host Reboot
# Ensure NVIDIA modules load at boot
cat /etc/modules-load.d/nvidia.conf
# Should contain:
# nvidia
# nvidia-uvm
# nvidia-modeset

# If the file does not exist, create it
sudo tee /etc/modules-load.d/nvidia.conf << EOF
nvidia
nvidia-uvm
nvidia-modeset
EOF

# Regenerate CDI spec after hardware changes
sudo nvidia-ctk cdi generate --output=/etc/cdi/nvidia.yaml
Docker Compose GPU Not Working
# Ensure you are using Docker Compose v2 (not the old v1 Python version)
docker compose version
# Should show: Docker Compose version v2.x.x

# The old v1 (docker-compose with hyphen) does NOT support the deploy.resources syntax
# If you must use v1, use the runtime approach instead:
#
# services:
#   myservice:
#     runtime: nvidia
#     environment:
#       - NVIDIA_VISIBLE_DEVICES=all

# For Compose v2, the deploy.resources.reservations.devices syntax is correct
# but requires the NVIDIA runtime to be configured in daemon.json
Kubernetes Integration
If you are deploying GPU containers at scale, you will likely use Kubernetes with the NVIDIA GPU Operator or the NVIDIA device plugin. The container toolkit is still the foundation — the Kubernetes components build on top of it.
# Install the NVIDIA GPU Operator via Helm (handles everything automatically)
helm repo add nvidia https://helm.ngc.nvidia.com/nvidia
helm repo update

helm install gpu-operator nvidia/gpu-operator \
  --namespace gpu-operator \
  --create-namespace \
  --set driver.enabled=true \
  --set toolkit.enabled=true

# Verify GPU nodes are detected
kubectl get nodes -o json | jq ".items[].status.allocatable" | grep nvidia

# Deploy a GPU pod
kubectl apply -f - << EOF
apiVersion: v1
kind: Pod
metadata:
  name: gpu-test
spec:
  containers:
  - name: cuda-test
    image: nvidia/cuda:12.6.0-base-ubuntu24.04
    command: ["nvidia-smi"]
    resources:
      limits:
        nvidia.com/gpu: 1
  restartPolicy: Never
EOF

kubectl logs gpu-test
Security Considerations for GPU Containers
GPU passthrough to containers has security implications that are worth understanding, especially in multi-tenant environments.
GPU memory is not automatically cleared between container runs. A container that allocates GPU memory and writes sensitive data (like model weights or inference inputs) leaves that data in GPU memory after the container exits. The next container to use that GPU could potentially read the stale memory. In production, use nvidia-smi --gpu-reset between sensitive workloads or enable ECC memory (which initializes memory on allocation but has a performance cost).
The NVIDIA driver has a large attack surface. By exposing GPU devices to containers, you are also exposing the kernel-mode driver interface. Keep your NVIDIA drivers updated, and consider running GPU containers with reduced capabilities — they do not need SYS_ADMIN or NET_ADMIN capabilities just for GPU compute.
# Run GPU containers with minimal privileges
docker run --rm --gpus all \
  --cap-drop ALL \
  --cap-add SYS_PTRACE \
  --security-opt no-new-privileges \
  --read-only \
  --tmpfs /tmp \
  nvidia/cuda:12.6.0-base-ubuntu24.04 nvidia-smi
Frequently Asked Questions
Can I use the NVIDIA Container Toolkit without installing the NVIDIA driver inside the container?
Yes, that is the entire point of the toolkit. The NVIDIA driver runs on the host, and the toolkit injects the necessary driver libraries into the container at runtime. Your container images only need the CUDA userspace libraries (like libcudart), not the kernel driver. This is why NVIDIA publishes base images like nvidia/cuda:12.6.0-base-ubuntu24.04 that include CUDA runtime libraries but not the driver.
Does the NVIDIA Container Toolkit work with rootless Docker or rootless Podman?
Rootless Podman with CDI works well starting from Podman 4.1+. Rootless Docker support is more limited and depends on your Docker version and the toolkit version. The CDI approach is generally more reliable for rootless setups because the device specification is a static file that does not require runtime privilege escalation. The main requirement is that the user has read/write access to the /dev/nvidia* device nodes, which you can configure with udev rules.
How do I share a single GPU between multiple containers?
There are three approaches. First, you can simply pass the same GPU to multiple containers — CUDA supports multiple processes on one GPU natively, with time-slicing. This is the simplest approach but has overhead from context switching. Second, enable CUDA MPS (Multi-Process Service) for lower overhead when sharing. Third, on newer GPUs (A100, H100), use MIG (Multi-Instance GPU) to partition the GPU into isolated instances. MIG provides hardware-level isolation but requires specific GPU models. For most AI inference workloads, basic time-slicing or MPS is sufficient.
What is the difference between the NVIDIA Container Toolkit and the old nvidia-docker2 package?
nvidia-docker2 was the predecessor to the NVIDIA Container Toolkit. It provided a custom Docker runtime wrapper called nvidia-docker that handled GPU passthrough. The NVIDIA Container Toolkit replaced it with a more modular architecture that works across multiple container runtimes (Docker, Podman, containerd, CRI-O) instead of being Docker-specific. If you have nvidia-docker2 installed, remove it before installing the container toolkit — they conflict with each other. The --gpus flag in Docker replaced the need for the nvidia-docker wrapper command.
Why does nvidia-smi work inside the container but my CUDA application fails?
nvidia-smi uses the NVML library, which only needs basic driver access. CUDA applications need the full CUDA runtime and potentially cuDNN, cuBLAS, or other libraries. If nvidia-smi works but your application fails, the issue is almost always a missing library in the container image. Use a CUDA base image that includes the libraries your application needs: base for NVML only, runtime for CUDA runtime, or devel for CUDA development headers and libraries. Check your application's error message — it will usually name the specific missing library (like libcublas.so).
Related Articles
- Install NVIDIA Drivers and CUDA on Linux Server for AI: The No-Nonsense Guide (2026)
- Docker GPU Passthrough on Linux for AI Workloads
- Ollama Docker Compose: Complete GPU Stack for Linux
- Kubernetes Ollama Deployment: Production GPU Scheduling and Scaling Guide
Further Reading
- Grootendorst, M. & Alammar, J. (2025). An Illustrated Guide to AI Agents. O'Reilly Media. Covers agent memory systems, RAG pipelines, tool usage, MCP protocol, and context engineering with clear visual explanations.
- Ranjan, R. et al. (2025). Agentic AI in Enterprise. Apress. Explores enterprise AI architecture, RAG vs fine-tuning trade-offs, vector databases, prompt engineering, GPU acceleration, and Kubernetes orchestration for production AI.
- Brousseau, D. & Sharp, T. (2025). LLMs in Production. Manning Publications. Covers neural network fundamentals, transformer architecture, GPU management, latency optimization, Kubernetes deployment, MLOps pipelines, embeddings, and model quantization.