
With working WiFi configuration.
Introduction
Diving right into the heart of the matter, many consider the installation process of Oracle Linux on a Raspberry Pi 3 to be quite similar. This belief arises because the Pi 3 has official support from the image.. Furthermore, you receive an installation image that offers a default setup of Oracle Linux (aarch64) within a raw disk image. This includes the Raspberry Pi 4 Model B, Raspberry Pi 400, and the Raspberry Pi 3 Model B/B+ single-board computer.
Furthermore, the installation image you receive is a default setup of Oracle Linux (aarch64) contained within a raw disk image. Notably, Btrfs stands as the default file system in use.
For those interested in the nitty-gritty, Oracle Linux images are currently in the development preview stage for the Arm architecture. Specifically, this guide targets Raspberry Pi 4B, Raspberry Pi 400, Raspberry Pi 3B, and Raspberry Pi 3B+ single board systems. Additionally, Oracle Linux 9 and Oracle Linux 8 disk images include the Unbreakable Enterprise Kernel Release 7 (UEKR7) based on the upstream 5.15 kernel.
Downloads
For downloads, you can visit:
As we journey through this article, we’ll be walking you through the installation process in real-time. This ensures that every step is verified and up-to-date.
However, a word of caution: Oracle labels its disk image for the Raspberry Pi as a technology preview, and it’s for developer use only. Consequently, Oracle doesn’t extend support for Oracle Linux on Raspberry Pi systems. For assistance, Oracle nudges developers towards the Oracle Linux for Arm community forum.
Prerequisites
- Raspberry Pi 4 (preferably the 4 GB RAM model)
- Removable storage media (we’re using a MicroSD card for the ISO image)
- A monitor and a compatible cable with a Micro HDMI connection
- USB Keyboard
Prepare the Installation Media
Start by downloading the Oracle Linux image from the links shared above. Once downloaded, unzip the disk image. Connect your SD card to your PC, Laptop, or MAC device. Finally, insert the SD Card into a connected SD Card reader.
Choosing the Right SD Card
A little inside scoop: The Raspberry Pi 4’s in-built SD card reader boasts a peak bandwidth of 50MB/s. However, in everyday scenarios, you’re more likely to experience speeds around 40MB/s. While any SD card supporting speeds beyond this might seem like overkill, we’ve opted for the SanDisk MicroSD Extreme Pro 32GB SD card. This card promises read speeds up to 100MB/s and write speeds nearing 90MB/s. Plus, snagging it for a mere 10 euros on Amazon was a steal!
Creating the Image
For this task, we’ll employ the BalenaEther software, a free SD card flasher tool.
- Begin by downloading and installing balenaEtcher.
- Insert your USB flash drive. If you have a USB 3 flash drive, ensure it’s plugged into a USB 3 port. These ports are typically blue or bear an “SS” or “SuperSpeed” logo. If you’re without USB 3, a USB 2.0 Flash drive will suffice.
- Launch Etcher.
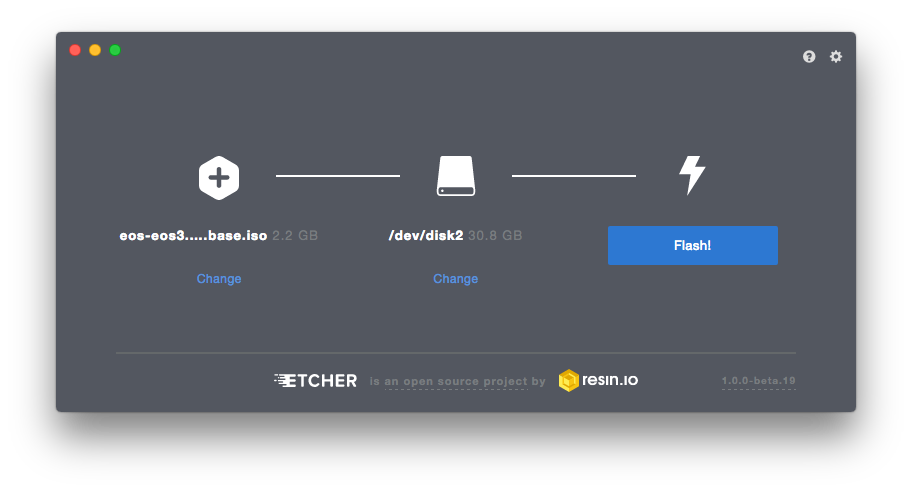
- Click on “Select image” and choose the Endless OS ISO or image file.
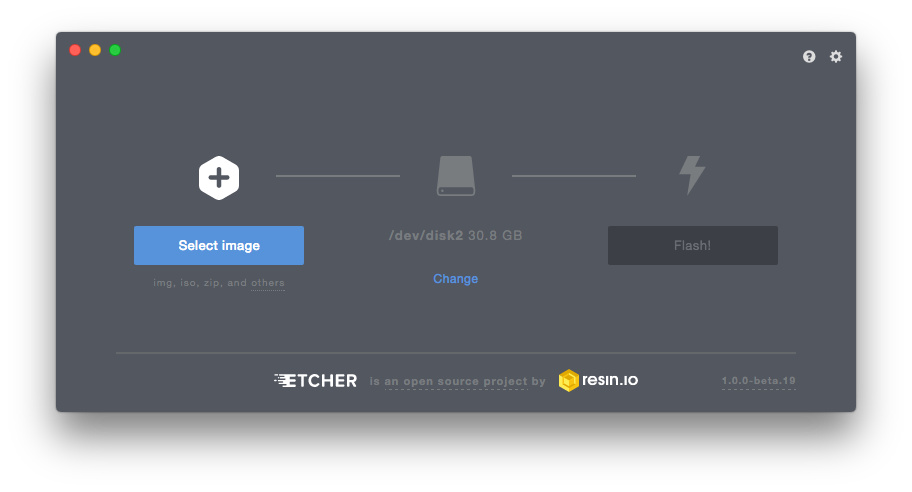
- Confirm the correct USB stick is selected. If not, click “Change” and make the right selection.

A word to the wise: Ensure you’ve selected the correct USB flash. If you mistakenly choose the wrong one, the tool will erase its contents. To avoid any mishaps, we recommend unplugging all other USB flash or SSD Drives at this juncture, barring the one earmarked for this installation.
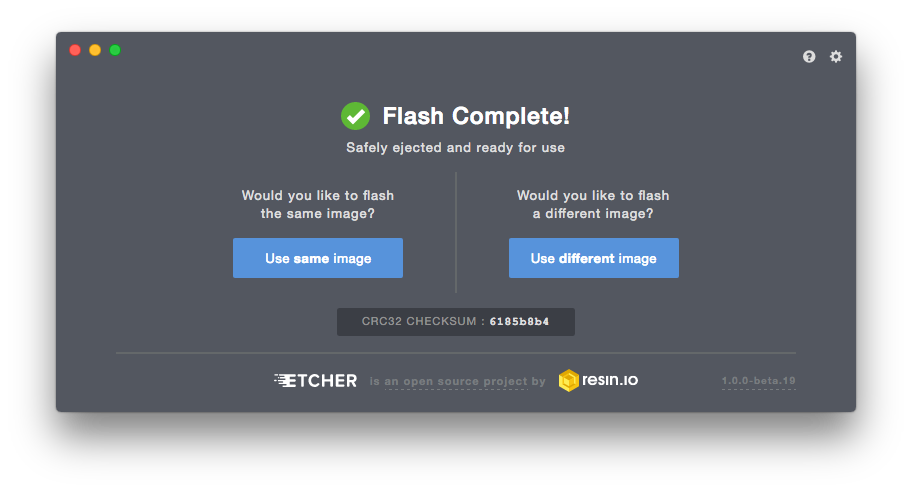
- Click the “Flash!” button.
You’ll be privy to the flashing progress, culminating in a notification signaling a successful completion.
A Few Things to Remember
- You’ll need a Network cable for connectivity since Oracle Linux 9 doesn’t support WIFI by default.
- Unlike RHEL but similar to Debian, root access is disabled by default.
With the Oracle Linux 9 now on your SD card, insert the MicroSD into the Raspberry Pi 4 and power it on. If your monitor is connected to the Pi 4, you should be greeted with the login screen. The default credentials are root:oracle. It’s a good practice to change this:
passwd rootFor those who prefer not to keep the monitor tethered to the Pi and wish to operate via an SSH terminal, you’ll need to either enable root access or create another user with sudo privileges. Here, we’ll simply enable root access using the sed command:
sed -i '/^#PermitRootLogin yes/s/^#//;/PermitRootLogin yes/!a PermitRootLogin yes' /etc/ssh/sshd_configExplanation:
This command performs two tasks:
- It searches for lines starting with “#PermitRootLogin yes” and removes the “#” at the beginning.
- If a line containing “PermitRootLogin yes” isn’t found, it appends “PermitRootLogin yes” to the file’s end.
For more on sed commands, check out our article on “Basic sed commands for Linux System Administration”.
To implement the changes, restart sshd:
systemctl restart sshdAt this juncture, your Raspberry Pi should have a dynamic IP assigned by your local DHCP server, typically located in your ISP-supplied router. If you’re unsure about your DHCP Server’s IP, use:
nmap -sn 192.168.1.0/24To determine your Pi 4’s IP, you can use any of the following commands:
ifconfig | grep "inet "
ifconfig | grep "inet " | sed -n 's/.*inet \([0-9]\+\.[0-9]\+\.[0-9]\+\.[0-9]\+\).*/\1/p'

ip addr show | grep "inet "

ip addr show | grep "inet " | sed -n 's/.*inet \([0-9]\+\.[0-9]\+\.[0-9]\+\.[0-9]\+\).*/\1/p'

nmcli | sed -nE 's/^.*inet4 ([0-9]{1,3}(\.[0-9]{1,3}){3}).*$/\1/p'
Switching to SSH terminal
With the IP in hand, you can connect to your Raspberry Pi 4, now powered by Oracle Linux 9, using your preferred SSH client.
Next, let’s address the unused disk space. The image will only utilize about 8GB of your SD card, leaving the rest untouched. To maximize usage, extend the partition:
fdisk -lu
growpart /dev/mmcblk0 3
btrfs filesystem resize max /
lsblk
To change the hostname, use:
hostnamectl set-hostname YOUR_DESIRED_HOSTNAMEUpdate your system with:
yum update -yTo glean details about your Linux version:
cat /etc/os-versionFor a modern touch, we’ll also install NetworkManager:
yum install NetworkManager -y

systemctl enable NetworkManager

systemctl start NetworkManager

systemctl status NetworkManager
Now, let’s install some add-on tools
NetworkManager-tui – Text user interface (TUI) for NetworkManager, which can be useful for managing network connections from a terminal.
NetworkManager-team – Support for creating team devices using NetworkManager.
NetworkManager-wifi – Wi-Fi support for NetworkManager.
yum install NetworkManager-tui NetworkManager-team NetworkManager-wifi -yTo implement the changes, restart NetworkManager:
systemctl restart NetworkManagerEnabling wifi requires a bit of finesse since it’s not set up by default:
Creating script to run modprobe and load our wifi driver:
cat << EOF > /usr/local/bin/load-wifi-module.sh

sleep 15

rmmod brcmfmac
sleep 5
modprobe -vvv brcmfmac
sleep 15
/usr/sbin/ip link set dev wlan0 up

EOF
To ensure this runs on every boot, create a service:
cat << EOF > /etc/systemd/system/load-wifi-module.service

[Unit]
Description=Load WiFi Module Script
After=network.target

[Service]
Type=simple
ExecStart=/usr/local/bin/load-wifi-module.sh

[Install]
WantedBy=multi-user.target

EOF
Now enabling this service and starting:
systemctl enable load-wifi-modulesystemctl start load-wifi-moduleCheck the status of service, it should come up with something like this:
# systemctl status load-wifi-module.service

● load-wifi-module.service - Load WiFi Module Script
Loaded: loaded (/etc/systemd/system/load-wifi-module.service; disabled; preset: disabled
)
Active: active (running) since Tue 2023-08-22 12:23:52 UTC; 7s ago
Main PID: 1428 (load-wifi-modul)
Tasks: 2 (limit: 21754)
Memory: 536.0K
CPU: 11ms
CGroup: /system.slice/load-wifi-module.service
├─1428 /bin/bash /usr/local/bin/load-wifi-module.sh
└─1429 sleep 15

Aug 22 12:23:52 rpi systemd[1]: Started Load WiFi Module Script.
To wrap things up, reboot your system:
I really appreciate your help